Thursday, February 26, 2015

February Update


Made quite a bit of progress this month starting with making a battery tray and mounting it into the car.
The kit calls for the battery to be placed under the floor of the trunk area but I like it up front better.  The front of the car could use a little more of the weight plus it is mounted much lower where I put it.

First step was to machine a cross bar to fit between the frame rails.


Next I took a piece of 5/8 aluminum plate that was laying around the shop and made the battery tray.


Here you can see the rear clamp holding the battery firmly onto the tray.


Easy to access, very secure, and the weight better placed.
That was a bit of work but it saved me from having to fabricate an access panel in the floor of the trunk area.   Speaking of which the trunk floor and sides are riveted in place!


Next I mounted the computer over the passenger footbox.  I'm not entirely pleased with this location but my choices were limited by the heater/AC unit which is located just above and behind it.
Going with a modern computer controlled engine means a couple hundred times more wire.


Another first for me was learning how to make braided steel fuel lines.
Center of the photo is the fuel pressure regulator located right behind the engine.
It's getting crowded in there.  My original vision of a clean uncluttered engine bay is fading.

And we now have a radiator!

So here is how it looks at the moment.
A long way to go but it is looking more like a car all the time.

Goal for March is engine startup.


Friday, January 9, 2015

JANUARY 2015 UPDATE

After a long time without much getting done, I might be on a roll again.
I think I'll just show a bunch of pictures this time with some explanations as needed.

Installing the heater/AC unit, I discovered that it interfered with the firewall so some more sheet metal work was called for.  Here is the firewall cut out in the offending area.
Next step was to make a poster board pattern.

Plenty of clearance!


Trace it onto the aluminum plate.
Cut it out on the shear.

Bend

Installed!


Now on to wiring.
 Fuse panel above the drivers feet.


The rear wiring for lights, fuel pump and fuel level is in place.
 Had to fabricate a bracket to hold the fuel filter. Top left of photo. 


 DASHBOARD!
Its really exciting to work on stuff that really shows progress.

Cutting holes for the heating/AC vents.
So nice to have a CNC mill next door.

Drilling rivet holes for tabs to attach the top dash cover.


Temporarily mounted in place.  Ready to cover and mount the instruments.

Wednesday, September 24, 2014

LONG OVERDUE PROGRESS REPORT

It has been 3 months since I recorded the progress on the car due to the fact that the summer has kept me hopping with other things.  However progress has been made, so here are a few of the high points:

This engine is much wider than the chassis was designed for and a few changes had to be made.
On test fitting the engine the valve cover was hitting the passenger footbox.


Cutting the interfering section out.

 I picked up this little sheet metal shear/brake/roll off of craigslist and it works great.

New piece cut bent and fitted.


The inside section of the driver side footbox had to be redesigned and new pieces fabricated.


Lots of room?
Actually it is better than it looks.  Nearly 1/2" of clearance.
I will have to modify the oil dipstick just a bit to make it easier to get in and out.


 The drive by wire throttle was installed by fabricating a bracket that mounts it much higher than the cable throttle used by older engines.


Another potential problem I found was the original mount bushings for the steering rack put the rubber boots so near the frame uprights that they rubbed and surely would be eventually damaged.  I turned some Delrin plastic replacements that moved the rack out about an 1/8" and down about 1/4"

and now the BIG news!
The engine and transmission are installed.


Easy with a forklift.

One of the nagging questions has been whether the headers made by Stainless Steel Headers Inc. would fit.  They were designed to work for the roadster and had never been tried in a coupe.
Well they just fit fine!  The headers in the picture are not the ones I will install but were sent to me for test fitting purposes.  Tomorrow I will send these back and they can start on my set.  My headers will merge into a 3" pipe instead of exiting with the 4 pipes the roadster uses.


Tuesday, June 24, 2014

THIS IS GOING TO TAKE A WHILE

Dave Smith, owner of Factory Five racing (maker of the car kit), has stated several times that they "sell projects".  
Years ago I interviewed an engineer for a job opening at the company I was working for.  On his resume he proudly stated how he had worked for nearly a year designing an alternator for GM.      
A YEAR TO DESIGN AN ALTERNATOR?
Then I learned that he was part of a TEAM that had done the design work on an ALTERNATOR.

Back to 2014.
A few months ago we purchased a new Toyota Avalon Hybrid with all the bells and whistles.  It is a marvel.  Blind spot monitor and alarm, radar cruise control, backup camera with cross traffic sensors and alarm.  If the radar senses a potential collision it will tighten the seat belts and apply the brakes.  It is averaging 43 miles per gallon.   Braking energy is used to charge the batteries. The doors unlock automatically when you touch the door handle (if you have the key on your person).  Etc, etc, etc.

All of that and in 6 months there hasn't been so much a hiccup.

So now I get it.

My car is a project, not to be confused with a modern production model coming off the assembly line.

It seems that usually when I start to assemble some part of the car, I find that things don't fit as well as they should, or I find myself thinking that I want to make it different than the way the kit was intended.

Case in point:
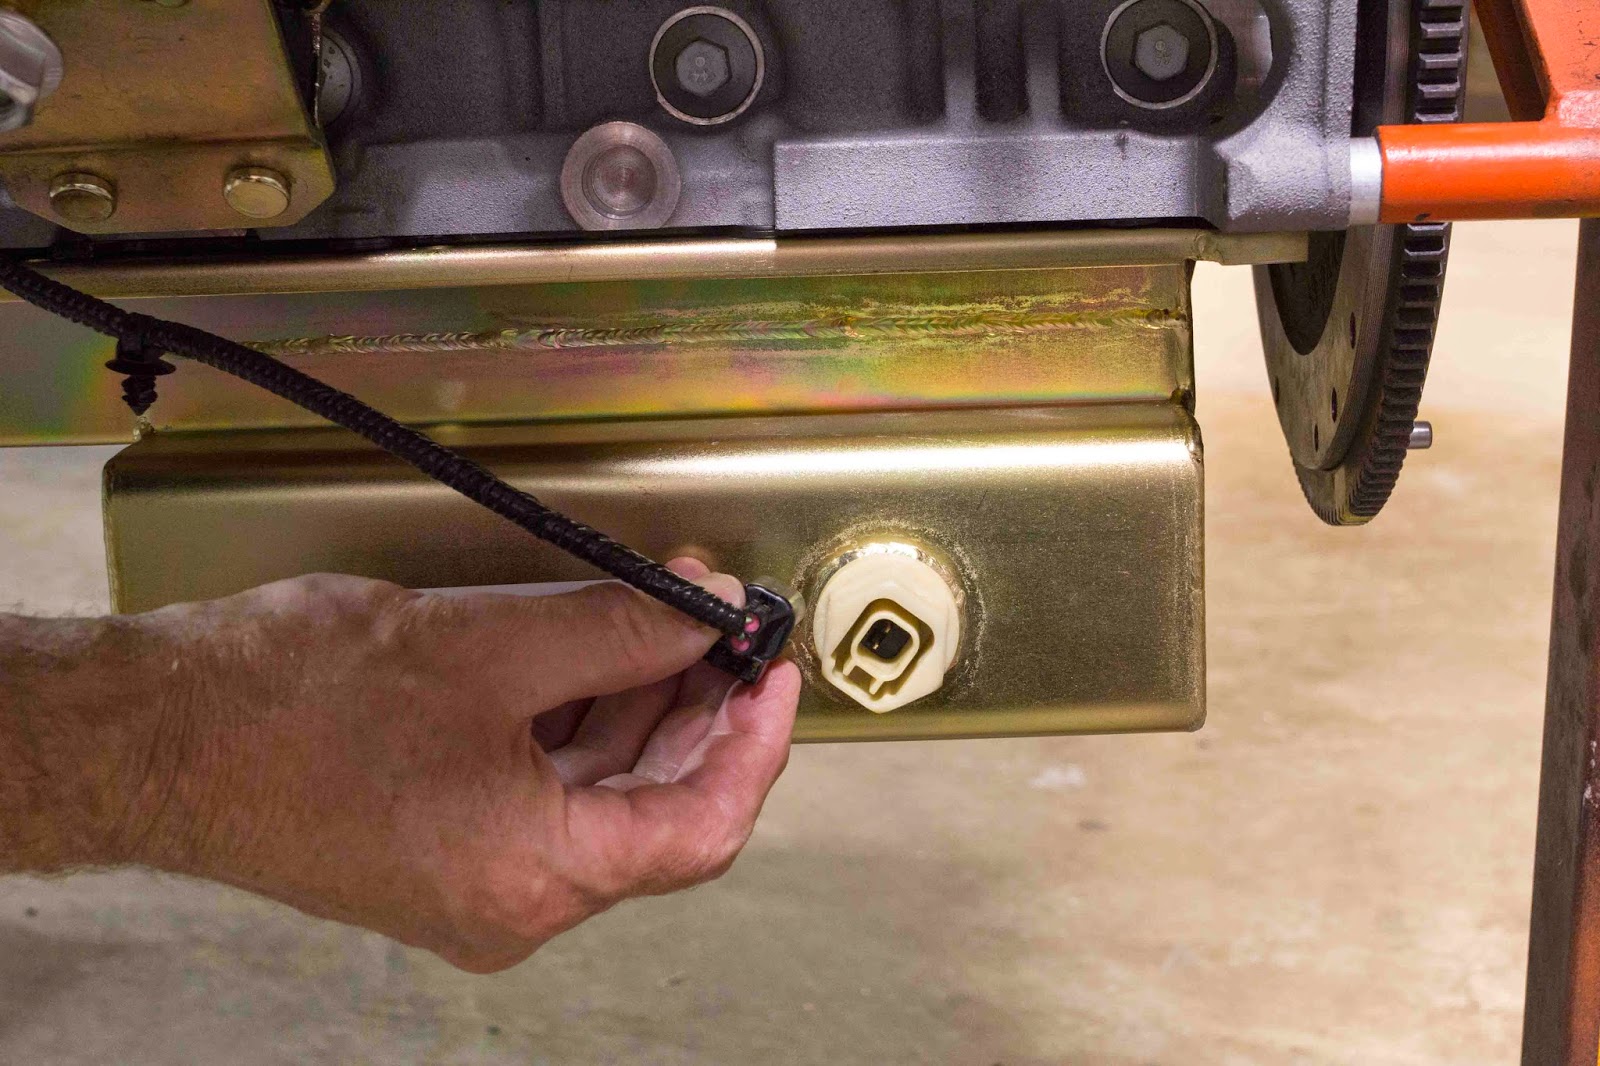
Saturday evening I replaced the engine oil pan with a custom one needed to fit the frame of the Daytona.  15 bolts to take it off, 15 to tighten up on the new pan, 10-15 minutes tops.  Well 2 hours later after grinding, test fitting and grinding again, trying to figure what part was interfering with what,  it is installed.


 I put tape down and then rubbed the oil pan around in place so I could see where the interference was.


 And after all was done, now the oil level sensor wire won't reach the sensor.

Yep, now I get it.  No team of engineers spent a year designing and testing every inch of this "project".

Don't misunderstand, I am not disparaging the maker of this kit in any way.  I love doing this and am very pleased with what is emerging here.  This will be a custom built one of a kind vehicle, that will require rework, more maintenance, have bugs, and more than a couple of my custom designs will probably have to be tweaked or even thrown out all together and started over. 

 I am OK with that.


Sunday, May 25, 2014

AN UNEXPECTED TURN OF EVENTS

So its been a while since the last update, mostly because little progress has happened on the car.
About the only physical build progress was the installation of the fuel lines.  A few pictures are still necessary for such an insignificant advancement because of the cool little clamps that I made.
As illustrated here:


Actually there is more to report.  
The car has gotten too heavy to be suspended up on the rotisserie so it is now on the ground on all fours.

 Its really nice to have a forklift next door.

And no, I didn't make motor noises....


But now to the title of this post, a few weeks ago Brenda and I found ourselves driving through Salt Lake City after a vacation in Moab, Utah(what a beautiful place).  It just so happens that CSX 2299
(#2 of the original 6 Daytona Coupe race cars) is in a wonderful little museum about 30 miles SW of Salt Lake.   It was a transforming experience for me.  I spent nearly an hour in front of this wonderful piece of automotive history. 


 And now it seems that I have to paint my replica the original blue with a white stripe.